Everything You’ll Need
| Tool/Material | Laminate Flooring | Purpose |
|---|---|---|
| Utility Knife | ✔ | Used to cut underlayment and trim laminate edges |
| Tape Measure | ✔ | Measures room size and plank cuts |
| Straight Edge | ✔ | Makes straight cuts and helps alignment |
| Pry Bar | ✔ | Removes baseboards or old floors |
| Spacers | ✔ | Keep expansion gaps by walls |
| Tapping Block | ✔ | Gently taps planks together without damage |
| Non-Marring Hammer | ✔ | Used with tapping block for tight fits |
| Laminate Cutter or Saw | ✔ | Cuts planks to the right size |
| Knee Pads | ✔ | Protects knees during installation |
| Level | ✔ | Makes sure subfloor and first row are even |
| Chalk Line | ✔ | Marks straight lines for alignment |
| Underlayment Roll | ✔ (if required) | Adds cushion and reduces noise |
| Jigsaw or Oscillating Tool | ✔ | Cuts unusual shapes (around pipes, door jambs) |
Step 1: Choose a Layout Pattern
Before you put down your laminate flooring, think about how to arrange the planks. Though laminate might not have as many pattern choices as vinyl or tile, your layout can still change how the room looks and feels.
These are the common and effective patterns for laminate flooring:
Straight Lay Pattern (Most Common)
The simplest and most popular choice.
Planks go along the longest wall or towards the light. This gives a clean, classic look, perfect for most spaces.
Diagonal Pattern
For a more stylish look.
Planks are placed at an angle, 45 degrees to the walls. This can make small areas seem bigger or add interest to square rooms. Note that this way might need more cutting and materials.
Random/Variable Stagger
Planks are placed in a mixed, staggered way, changing lengths each row.
This mimics the natural look of hardwood and stops patterns from repeating or seams from lining up.
Herringbone or Chevron (Advanced/Pro)
Some special laminate floors can be arranged in herringbone or chevron patterns.
These beautiful layouts need careful cuts and planning. Not all laminate brands have planks for these patterns.

Step 2: Prepare the Space
Take Off Baseboards and Old Flooring
First, take off the baseboards and old flooring to have a clean surface.
Use a pry bar to gently remove the baseboards — be careful to not damage the walls so you can use the trim later.
If taking out carpet, cut it into smaller pieces with a utility knife and lift it up.
For tile, vinyl, or wood, follow the right steps to remove each.
Clean and Check the Subfloor
Sweep and vacuum well to get rid of all dust and dirt.
Look for cracks, dips, or bumps. Use a leveling compound to fill low spots and sand down high ones. A smooth subfloor is important for a long-lasting laminate floor.
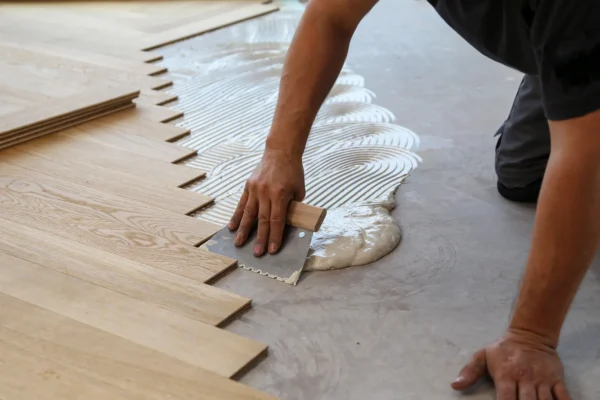
Put Down Underlayment
Most laminate floors need an underlayment unless it already has one attached.
Underlayment gives cushioning, cuts down noise, and fixes small subfloor problems.
Roll it out over the subfloor, making sure edges meet without overlapping. Tape the seams well.
✅ Pro Tip: If putting it over concrete, think about adding a moisture barrier under the underlayment.
Step 3: Choose an Installation Method
Laminate flooring is easy for DIY projects and mostly uses one simple way to install: Click-Lock (Floating Floor). Laminate usually does not need glue or peel-and-stick methods.
Click-Lock (Floating Installation)
The Click-Lock system, also known as tongue-and-groove or interlocking, is the most common and DIY-friendly choice for laminate flooring. The planks are made to click together, creating a strong link without nails or glue.
This lets the floor “float” over the subfloor, allowing it to expand and contract naturally with changes in temperature and humidity.
Key Advantages:
- No adhesives required — easier to clean and needs fewer materials.
- DIY-friendly — perfect for beginners.
- Versatile — works on different subfloors, like concrete and plywood.
Installation Tips:
- Always leave a 1/4-inch expansion gap around the room’s edge using spacers to avoid buckling as the floor expands and contracts.
- Follow the manufacturer’s directions for plank alignment and clicking techniques.
- Use a tapping block and pull bar to ensure tight seams without harming the plank edges.
Step 4: Lay the First Row
Trim the Short Tongue Edge of the First Plank
Start by cutting off the short tongue edge of your first plank. This makes the plank fit well against the wall for a neat look. Use a utility knife for thin laminates or a circular saw or miter saw for thick planks.
Position the First Plank 1/4 Inch from the Wall
Put the first plank by the starting wall, leaving a 1/4-inch gap between the plank and the wall. This gap is important because laminate flooring changes with temperature and humidity.
Insert Spacers to Maintain the Expansion Gap
Use spacers between the wall and flooring to keep the expansion gap as you lay the floor. Keep using these spacers around the room.
Stagger End Joints for Stability and Appearance
For the second row, cut the first plank to be at least 6 inches shorter than the first plank of the last row. This staggers the end joints, making the floor stronger and look nicer.
Tip: Don’t line up joints across rows — it can make the floor weak and look fake.

Step 5: Cutting Planks to Fit
Straight Cuts — Score and Snap
For straight cuts (like trimming the end of a plank):
Use a utility knife to mark your cut line.
Break the plank along the mark for a clean edge (best for thin laminates).
For thicker laminate, use a laminate cutter, circular saw, or miter saw for neat cuts.
Irregular Cuts — Around Corners and Obstacles
For cutting around door frames, corners, or odd shapes:
Use a jigsaw or oscillating multi-tool.
These tools make precise, curved, or angled cuts.
Cutting Around Pipes
Measure the pipe size and add 1 inch for expansion.
Drill a hole in the plank for the pipe.
Cut straight from the hole to the edge of the plank.
Seal around the pipe with silicone caulk to prevent moisture.
Tight Spaces — Under Door Jambs
Use a jamb saw to trim the bottom of the door frame.
This lets you slide the plank under for a neat look.
Pro Tip: Wear safety goggles and work slowly with power tools to prevent damage.
| Cutting Task | Recommended Tool(s) | Technique |
|---|---|---|
| Straight cuts (length/width) | Utility knife (thin laminate) Laminate cutter or miter saw (standard) | Mark and snap for thin laminate Use a saw for straight cuts |
| Irregular cuts (corners, curves) | Jigsaw or oscillating multi-tool | Mark shape, cut slowly along the line |
| Around pipes | Drill + Jigsaw or Hole saw | Drill a hole + cut a slit to the edge, leave ½” expansion gap |
| Tight spaces (door jambs) | Jamb saw (undercut saw) | Undercut the jamb to slide the plank underneath |
| Final fitting/trimming | Utility knife or laminate cutter | Trim small excess for a snug fit |
Step 6: Laying Subsequent Rows
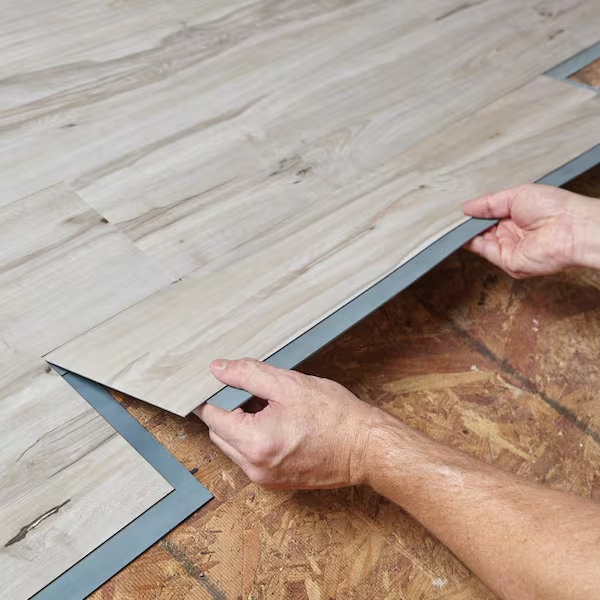
Angle the Planks into Place
Start each row by tilting the tongue of the plank into the groove of the last row. Lower the plank gently until it clicks or fits tightly.
Use a Tapping Block and Non-Marring Hammer
For a snug fit, use a tapping block and a non-marring hammer (or mallet).
Put the tapping block at the plank’s edge.
Tap softly to close gaps between planks.
Never hit directly with a standard hammer on the laminate—it might chip or harm the edges.
Maintain the Staggered Pattern
Keep staggering the end joints by at least 6 inches in every row for stability and a natural look.
Check Expansion Gaps
Use spacers along walls to keep the 1/4-inch expansion gap during installation.

Step 7: Finishing the Installation
Install Transition Strips
After all planks are laid, put transition strips at doorways and where laminate meets other floors. These strips:
Make a smooth, safe change between floors.
Keep the edges of your laminate safe.
Use the manufacturer’s guide for type and setup.
Transitioning to Other Flooring
Choose the right transition type:
T-molding for floors of the same height.
Reducer strips for moving to lower floors like tile or vinyl.
Fix transition strips to the subfloor, not directly to the laminate, leaving a 1/4-inch gap to stop buckling.
Reinstall Baseboards
Put back baseboards, attaching them to the wall, not the floor, so the laminate can move freely underneath.
Allow the Floor to Settle
Before placing furniture back or walking a lot on the floor:
Give it at least 48 hours to adjust to the room’s temperature and humidity.
Common Mistakes to Avoid When Installing Laminate Flooring
High-Moisture Area Installation
Laminate floors shouldn’t be used in places with a lot of moisture, like bathrooms or laundry rooms. Water can get into seams and cause swelling or warping.
Hammer Use on Planks
Never hit laminate directly with a hammer. Always use a tapping block or pull bar to gently secure planks without harming their edges.
End Joint Overlap
Avoid aligning or overlapping end joints of planks in nearby rows. This weakens the floor and can create gaps or uneven areas. Stagger joints by at least 6 inches.
Expansion Gap
Not leaving a 1/4-inch expansion gap around the room’s edge can cause buckling as the floor expands and contracts with temperature and humidity changes.
Walking on New Floor
Let the laminate floor adjust and settle for 48 hours after installing before walking on it or adding heavy furniture.
Tips for a Successful Laminate Flooring Installation
- Measure Carefully and Plan for Extra
Measure the room well and buy 10% more laminate flooring for cuts, mistakes, and repairs later. - Check Planks Before You Start
Look at each plank for any issues before using it. Set aside any that are damaged to keep the finish nice. - Wear Knee Pads for Comfort
Use knee pads to protect your knees, especially when working for a long time. This helps you work better. - Take Your Time and Work Carefully
Go slowly with each step, from the first row to cutting planks. Rushing can create bad fits and mistakes. - Keep the Right Expansion Gap
Leave a 1/4-inch expansion gap around the edges to stop buckling as the laminate changes size.
DIY vs. Professional Laminate Flooring Installation
Many homeowners pick laminate flooring because it’s easy to install yourself. Whether you do it yourself or hire someone depends on what you’re comfortable with, your tools, and how complicated the project is.
DIY Installation
✅ Pros:
- Save money on labor (usually $2 to $5 per sq ft).
- Work at your own speed.
- Good for small, simple rooms.
❌ Cons:
- Need basic tools (spacers, tapping block, saws).
- Errors like wrong expansion gaps can cause issues.
- Takes time, especially for big or odd-shaped spaces.
Professional Installation
✅ Pros:
- Quick and accurate installation.
- Experts manage floor prep, tricky cuts, and transitions.
- Often comes with a warranty.
❌ Cons:
- Extra cost — generally adds $2 to $5 per sq ft for labor.
Typically, laminate flooring installation (materials + labor) costs from $4 to $12 per square foot based on style and complexity. For more details, see our Laminate Flooring Cost Guide.
| Installation Method | Average Cost per Sq Ft | Pros | Cons |
|---|---|---|---|
| DIY Installation | $1.50 – $4 (materials only) | Save on labor Flexible schedule Good for small areas | Time-consuming Needs tools & skills Mistakes can be costly |
| Professional Installation | $4 – $12 (materials + labor) | Fast & precise Often includes warranty Handles complex cuts & transitions | Higher upfront cost |
Do You Need Professional Help With Your Laminate Flooring Installation Project?
Now that you know how to install laminate flooring, you’re on your way to a nice, strong floor. If you’d prefer not to do the work, our expert team can help.
We take care of everything — from getting the subfloor ready to aligning the planks perfectly — so you can enjoy perfect, lasting results. We’ll help you pick the right laminate style and underlayment for your space and budget.
Contact us today to book your free in-home consultation and check if we serve your area.